
NetChai MeetingUser Guide
How to Use NetChai Meeting
- 01.Launch NetChai Meeting
- 02.Log In
- 07.Chat
- 08.File sharing
- 09.Leave Meeting
- 10.Whiteboard
Launch NetChai Meeting
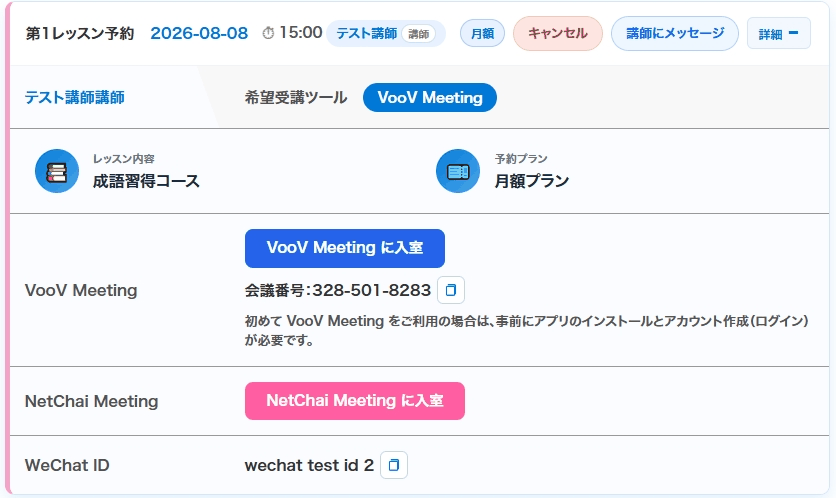
1. Open "Lessons" > "Reservations & Recent History" from the member menu. You will see a "NetChai Meeting" row in the lesson information area, as shown below. When your lesson start time comes, click the pink "Join NetChai Meeting" button.
2. NetChai Meeting opens in a new browser tab.
* If prompted to allow camera and microphone access for netchai.online, click "Allow while visiting the site."
Log In
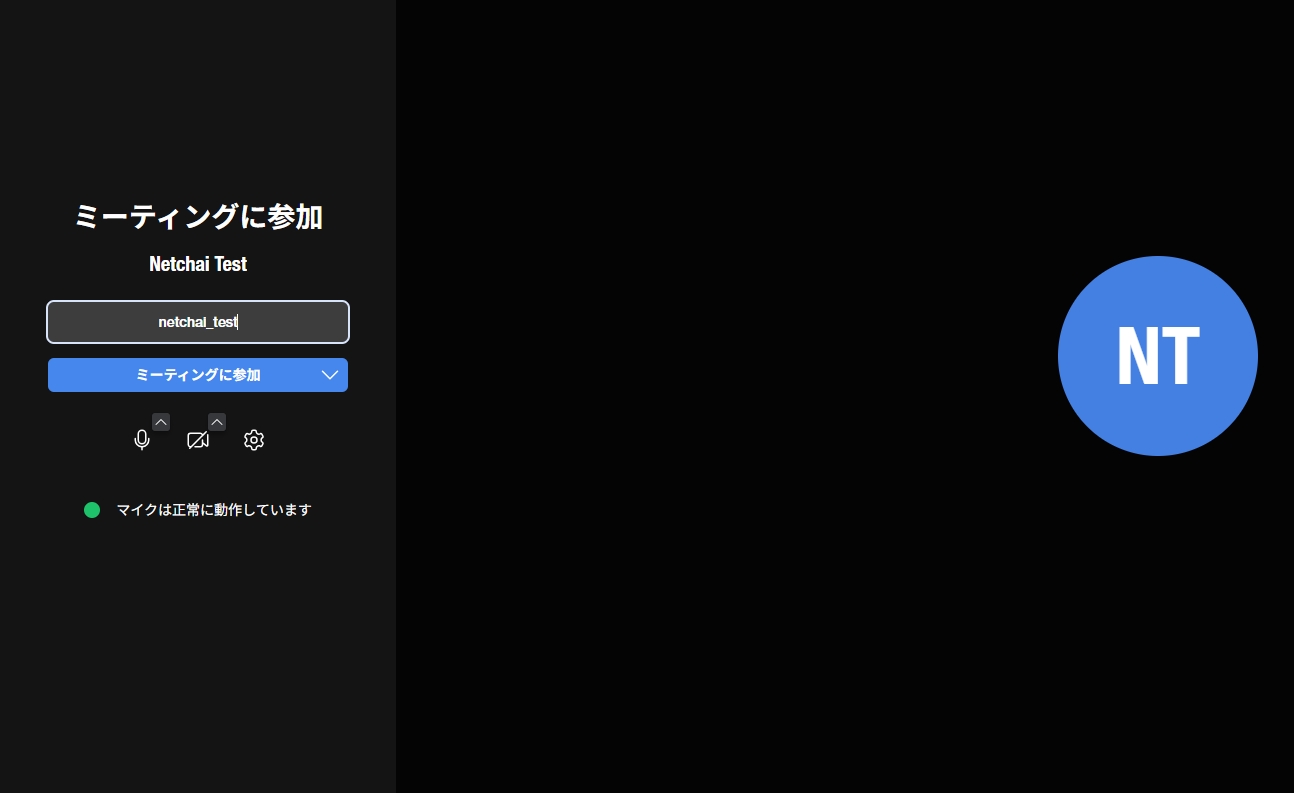
1. When the NetChai Meeting screen appears, enter your name in the field above the blue button on the left. Any name is fine. Then click the blue "Join Meeting" button below.
2. No password is required. When you enter using the button on the NetChai site, you go straight into your lesson room.
3. Once authenticated, the NetChai Meeting screen appears and your lesson can begin.
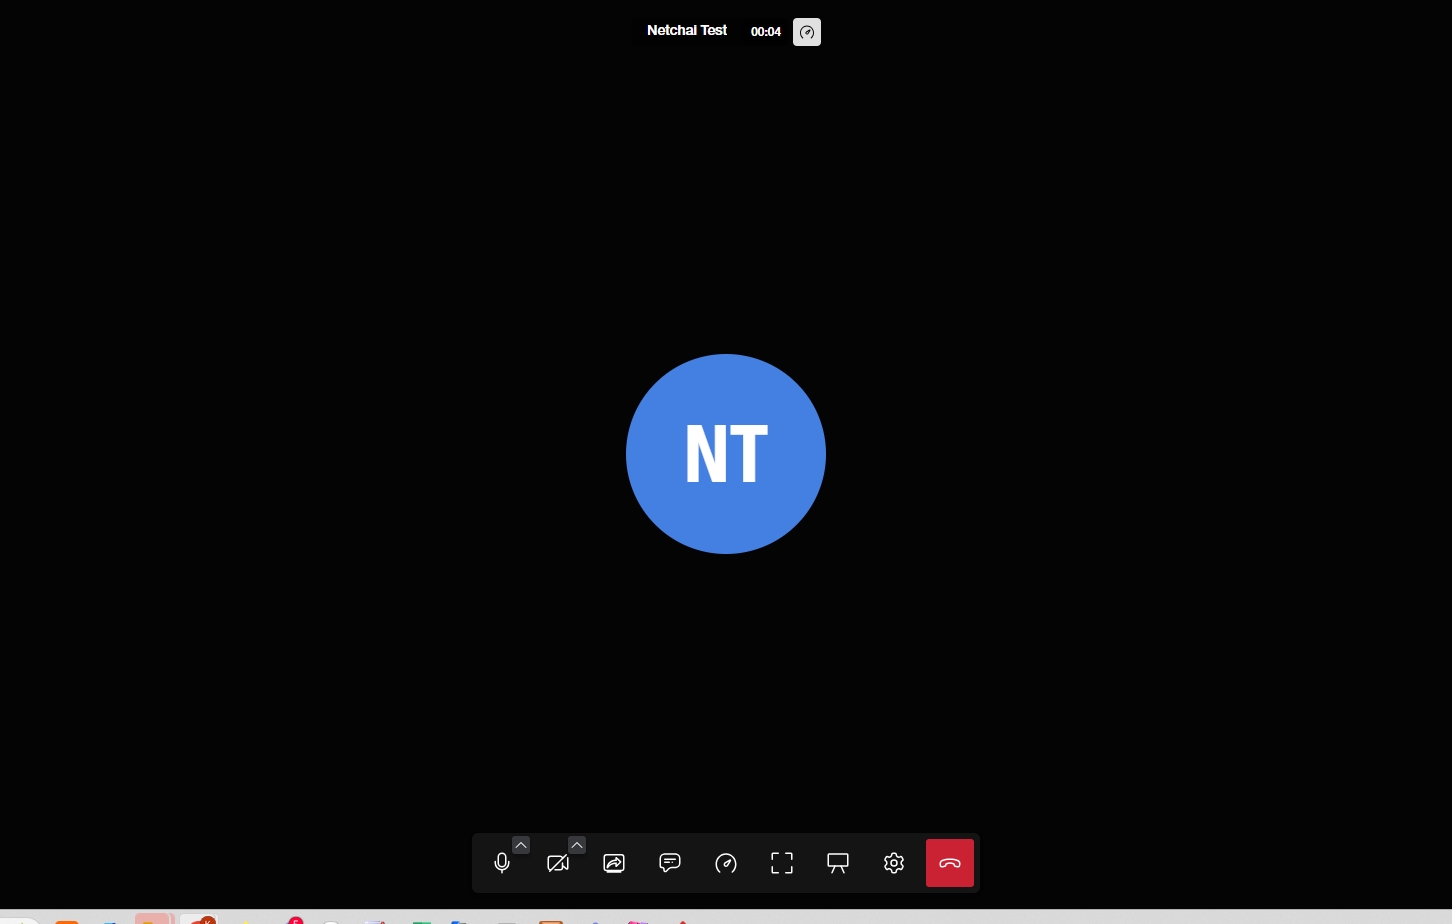
* Use the icons at the bottom of the screen to adjust your microphone, speaker and webcam. You can also use the chat window and the whiteboard.
Test Your Equipment Before the Lesson
If you only notice "my voice isn't getting through" or "I can't hear any sound" after the lesson has started, you may end up missing that lesson. You can test your microphone, speakers, and webcam anytime from the member menu under "How to Use the Lesson Tools" → "NetChai Meeting Test."
2. A pre-entry check screen will open. Please confirm that your camera image is showing.
3. Use the arrow next to the microphone icon to select your microphone. If it responds when you speak, your microphone is working properly.
4. Tap "Play Test Sound" to check whether sound comes out of your speaker (earphones).
5. Once you're done checking, just close the tab. Tapping "Join Meeting" also lets you enter a room by yourself to check your settings in more detail.
<Please Note>
· Tutors cannot enter the NetChai Meeting Test room. For actual lessons, please join as usual from the join button in "Bookings & Recent History."
Mic & Speakers
1. Before logging in: tap the settings icon (rightmost of the three buttons at the bottom left). After logging in: tap the settings icon (second from the right at the bottom of the screen).
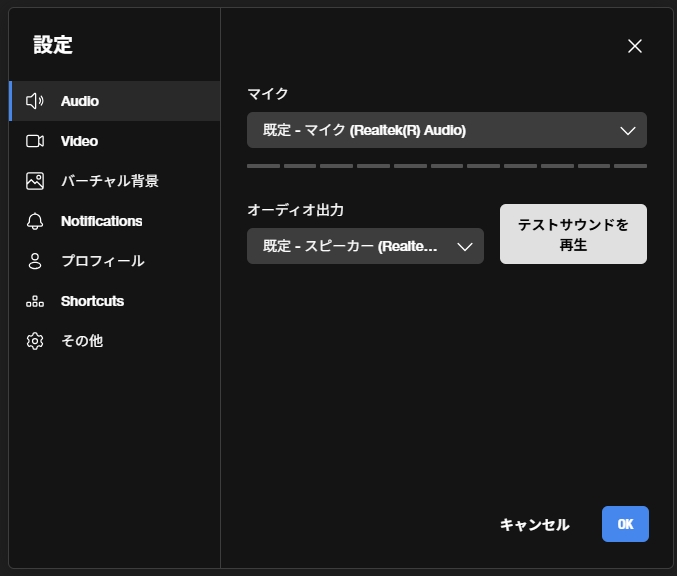
2. In settings, select "Audio" at the top left to configure your microphone and speakers.
Click "Play test sound" to test your speakers. If the microphone volume meter responds, your mic is working too.
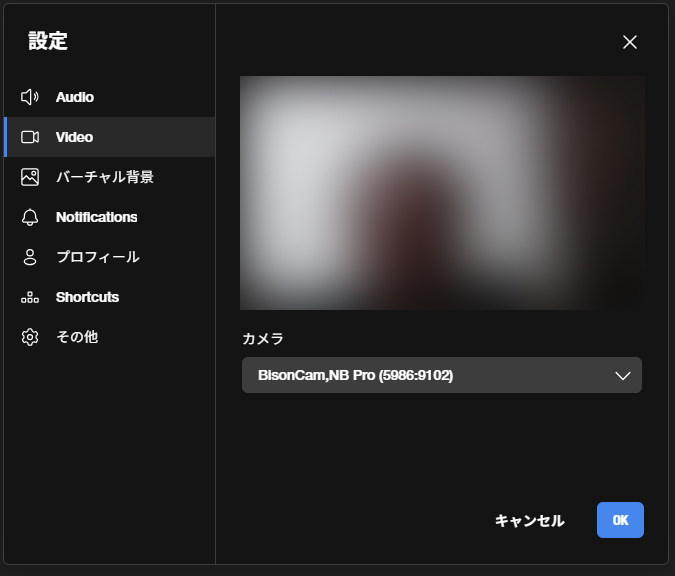
Webcam
1. Before logging in: tap the settings icon (rightmost of the three buttons at the bottom left). After logging in: tap the settings icon (second from the right at the bottom of the screen).
2. In settings, select "Video" (second from top) to configure your webcam.
Virtual Background
1. Before logging in: tap the settings icon (rightmost of the three buttons at the bottom left). After logging in: tap the settings icon (second from the right at the bottom of the screen).
2. In settings, select "Virtual Background" (second from top) to set your background.
Chat
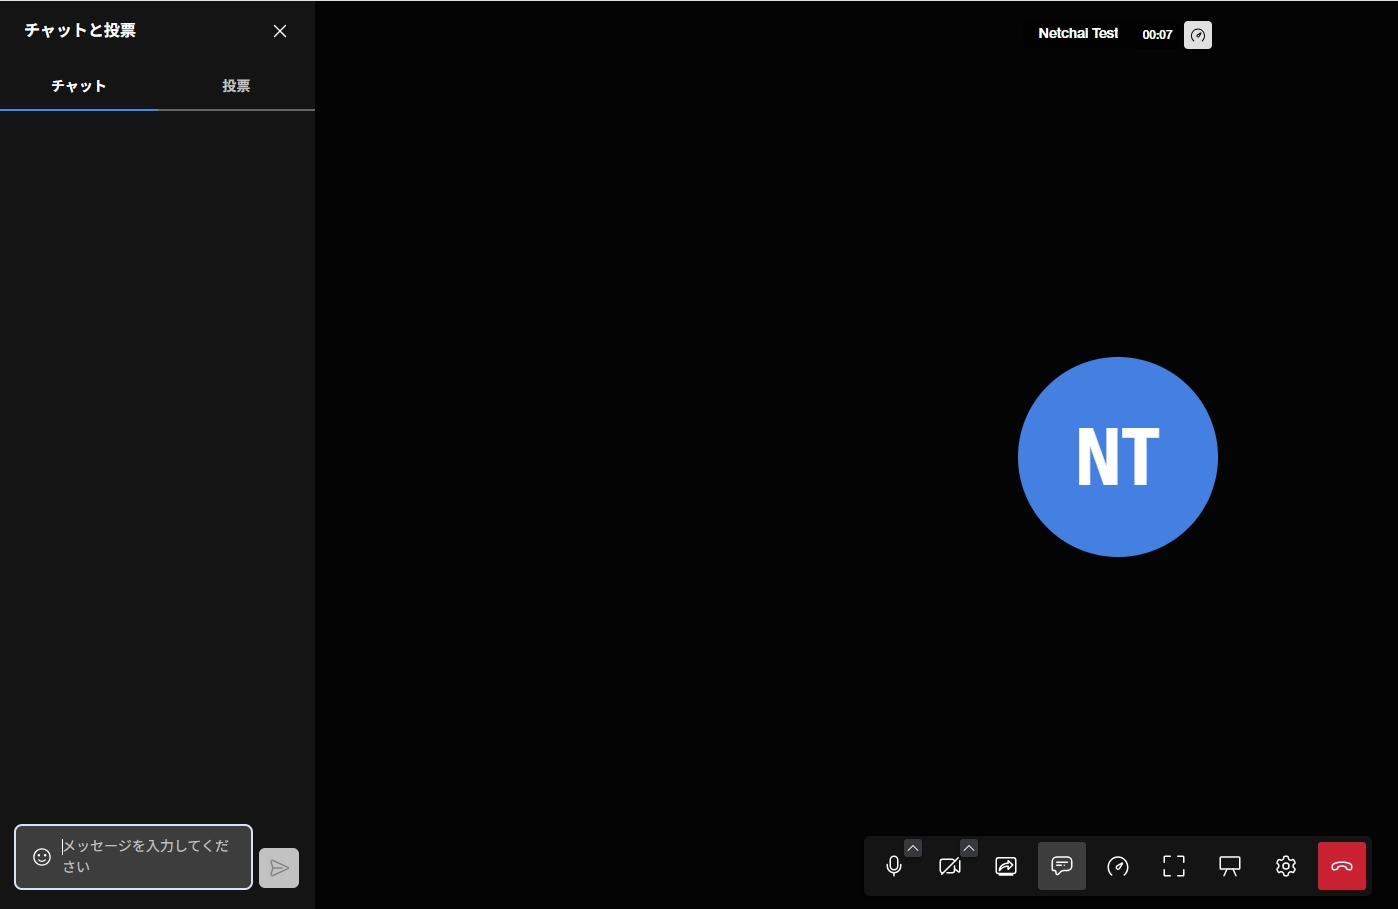
1. After logging in, tap the chat icon — the fourth icon from the left at the bottom of the screen.
2. A chat panel appears on the left.
File sharing
During your lesson, you and your tutor can send files to each other. You can send things like printed materials or photos of something you have written.
* This feature has not been localized into Japanese yet, so it is displayed in English. Please follow the English labels shown below.
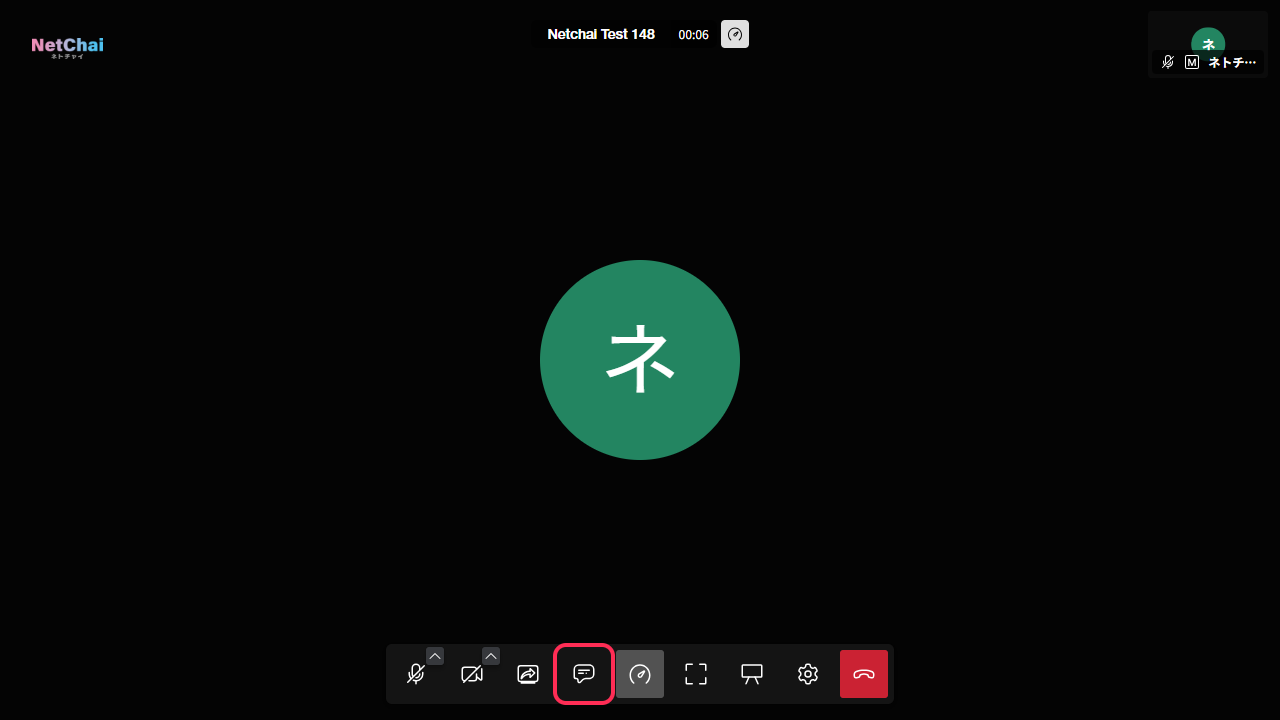
1. Click the fourth icon from the left among the icons at the bottom of the screen (the speech-bubble chat icon). The chat window opens on the left side of the screen.
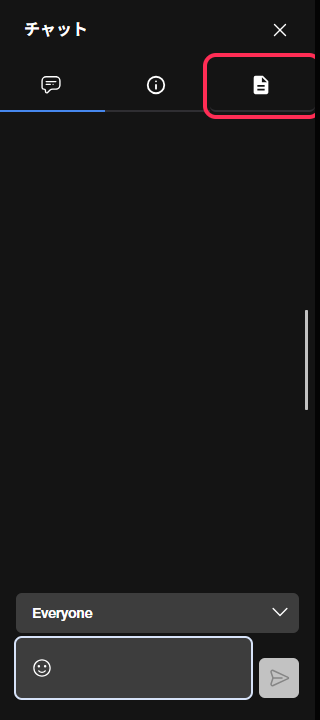
2. At the top of the chat window, there are three icons (from left to right: "Chat", "Polls", and "Files"). Click the document icon on the far right to switch to "Files".
3. Click the blue "Share file" button below and select the file you want to send. You can also drag and drop the file directly (you can drop it anywhere on the screen).
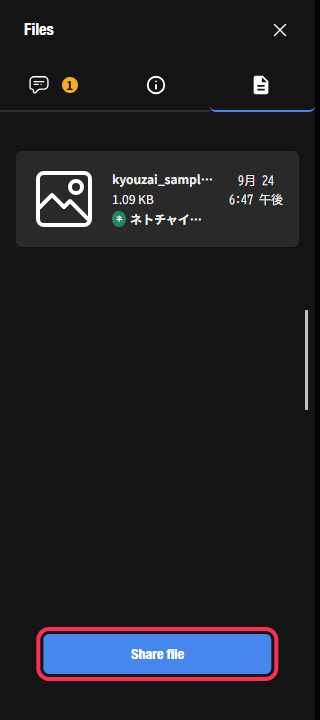
4. Once sent, a notification appears on the other person's screen and the file is listed under "Files". The recipient can save it by clicking "Download".
* Each file may be up to 50 MB. Larger files cannot be sent.
* Either the tutor or the student can send files.
* Please download and save any files you receive while the lesson is still in progress.
Leave Meeting
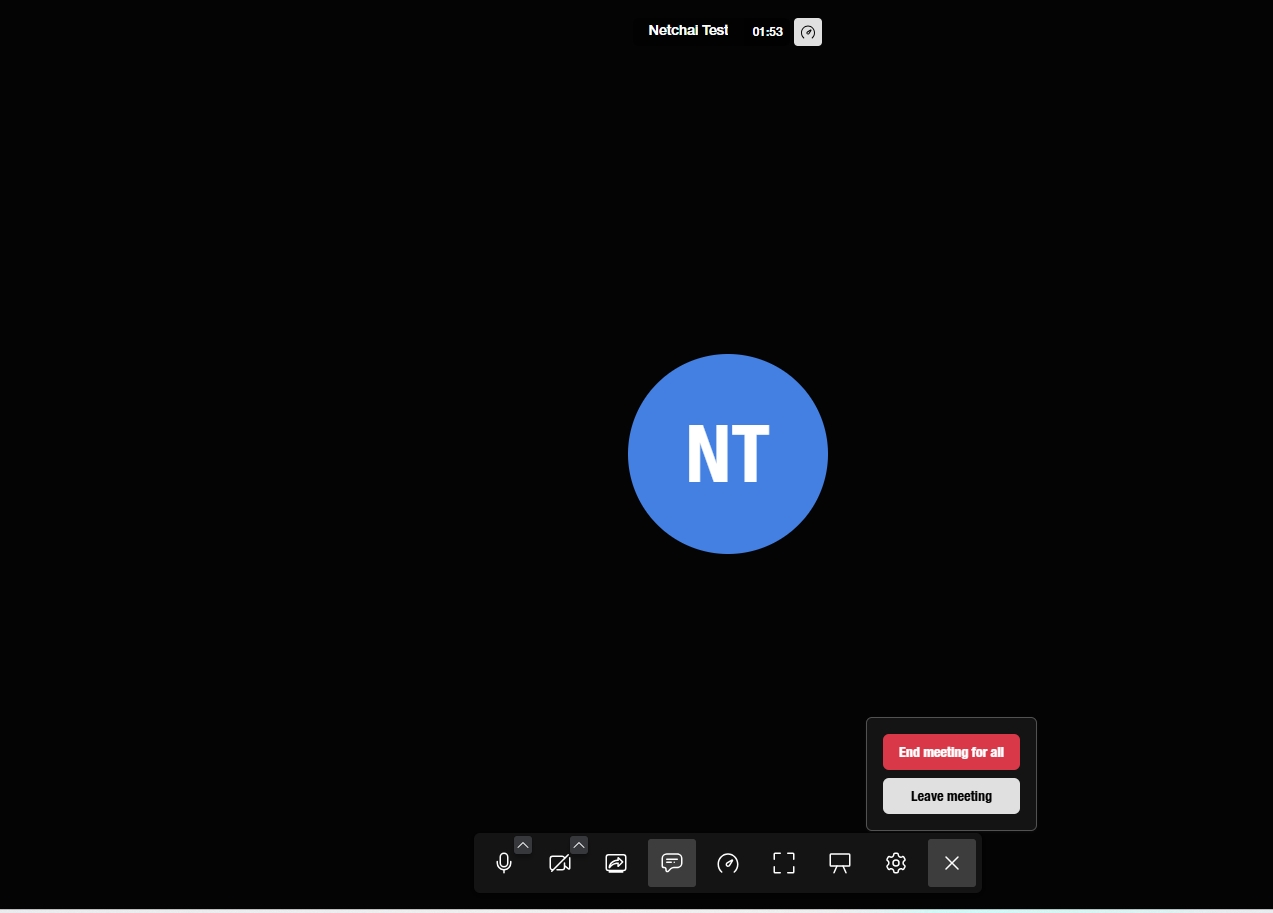
1. Click the red leave icon at the far right of the icons at the bottom of the screen.
2. Click the red button above. The meeting will end.
Whiteboard
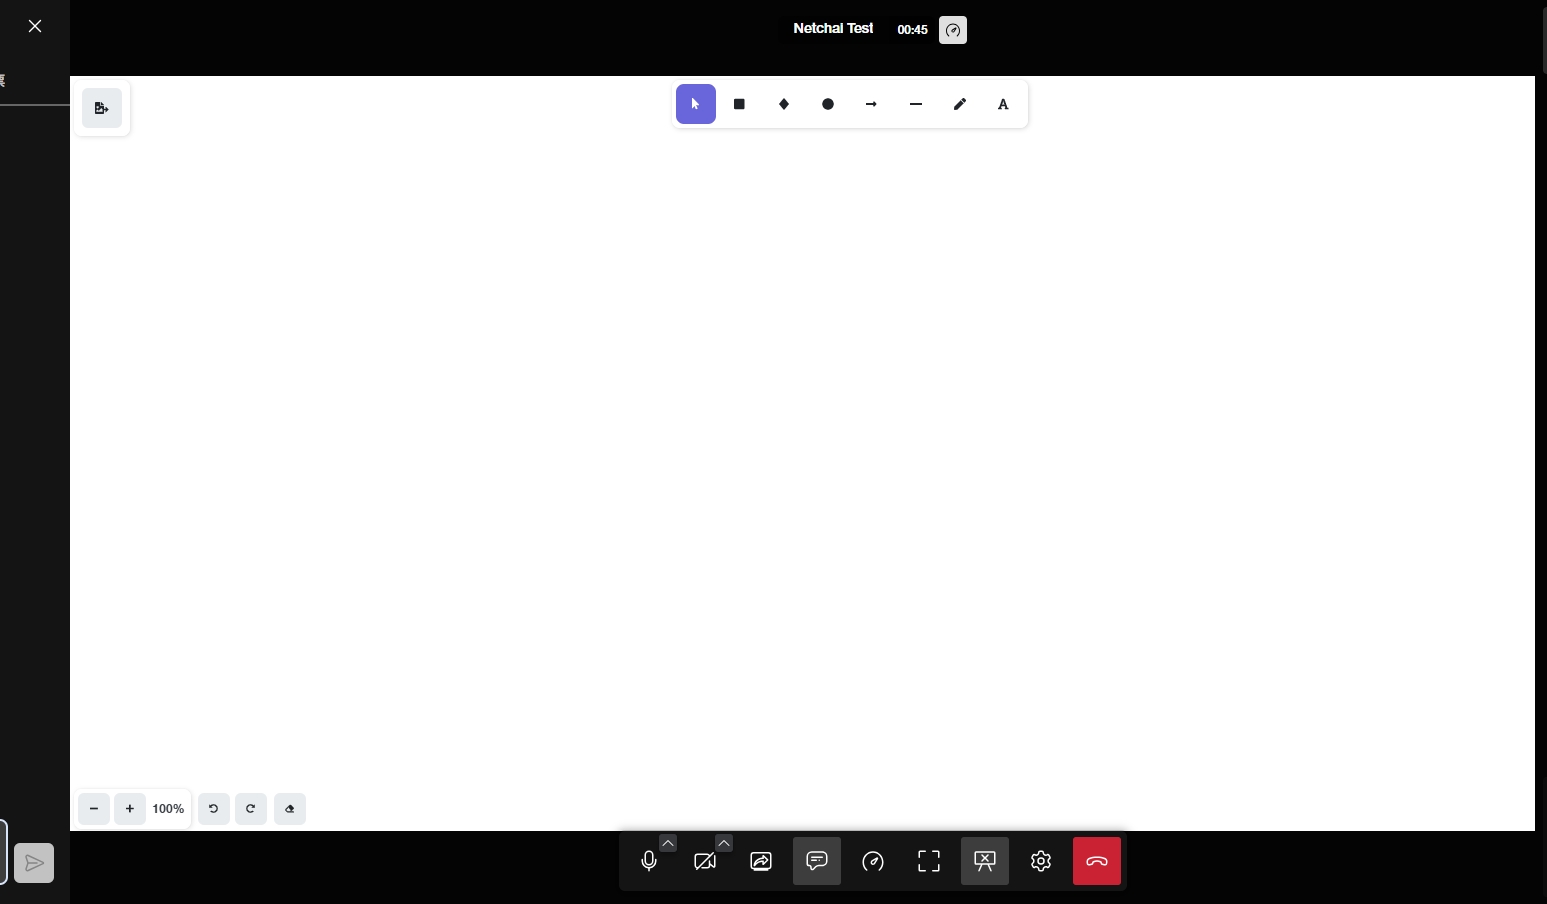
1. Click the whiteboard icon — third from the right in the bottom toolbar.
2. The whiteboard appears on screen.
* The whiteboard is shared — both you and your tutor can write on it.
If your voice isn't getting through, or you can't hear anything
* The most common cause is not "the browser is blocking access" but one of these two: "you are muted" or "the wrong microphone is selected". Please check in the order below.
- You can hear your tutor, but your voice doesn't reach them -> The problem is with your microphone (see 1-3 below)
- Your voice reaches your tutor, but you can't hear them -> The problem is with your speaker or earphones (see 4 below)
- Neither audio nor video gets through in either direction, but chat works -> The problem may be with your connection (see 6 below)
1. Check that you are not muted.
If the microphone icon at the bottom of the screen has a line through it, you are muted. Click it to unmute. If your headset or earphone cable has a physical mute switch, please check that too.
2. If you are using earphones with a microphone, check that the plug is pushed all the way in. If it is not fully inserted, you may be able to hear sound while the microphone alone is not recognized.
3. Check that the correct microphone is selected.
In "Audio" on the settings screen, check that the device you are currently using is selected. If you speak while pressing "Play a test sound", the microphone volume bar above will react. If it reacts, your microphone is working.
See how to adjust and test your microphone and speaker here
4. If you can't hear your tutor, check that your computer's volume is not muted or set to zero, and that a different device is not selected while you have earphones plugged in. In "Audio" on the settings screen, press "Play a test sound" and check whether you can hear it.
5. If other call apps (Zoom, Teams, VooV Meeting, WeChat and so on) are still running, they may compete for the microphone and camera. Please close them all before your lesson.
6. If none of the above helps, try leaving and re-entering the room, then restarting your browser, then restarting your computer, in that order. If your Wi-Fi is unstable, please also try a different connection such as a wired connection or your smartphone's tethering.
If the problem is still not resolved, please contact the office using the message function in "Reservations & Recent History". Letting us know the following will help us identify the cause quickly.
- Were you able to use chat? (yes / no)
- Could you hear your tutor's voice? (yes / no)
- Did you hear anything when you pressed "Play a test sound"?
- Which browser (Chrome, Edge, Safari, Firefox) and which device (Windows, Mac, iPhone, Android) you are using
- The date and time of the lesson and the name of your tutor
Allowing camera and microphone access in your browser
The first time you enter, your browser shows a pop-up saying something like "netchai.online wants to use your camera and microphone". If you choose "Block" here, your camera and microphone will stay unusable from then on.
First, close the NetChai Meeting tab and enter again. When the pop-up appears, choose "Allow while visiting the site" (or "Allow").
If the pop-up does not appear, your earlier "Block" choice has been remembered. Please change the setting using the steps below for your browser.
1. Click the "More" icon at the top right of Chrome (three dots stacked vertically) and select "Settings".
2. Select "Privacy and security" > "Site settings".
3. Under "Permissions", select "Camera" or "Microphone".
4. If "netchai.online" appears under "Not allowed to use your camera (microphone)", select it and change it to "Allow".
1. Click "Settings and more" at the top right of Edge (three dots) and select "Settings".
2. On the left, select "Privacy, search, and services" > "Site permissions" > "All sites". Depending on your version, the item on the left may be "Cookies and site permissions".
3. Select "netchai.online".
4. Change "Camera" and "Microphone" to "Allow".
1. In the menu bar at the top of the screen, choose "Safari" > "Settings".
2. Click "Websites".
3. Select "Camera" in the list on the left, then choose "Allow" from the menu next to "netchai.online".
4. Set "Microphone" to "Allow" in the same way.
1. Open "Settings" in Firefox and select "Privacy & Security".
2. Scroll down to "Permissions" and click "Settings…" for "Camera" or "Microphone".
3. If "netchai.online" is set to "Block", change it to "Allow", or remove it and enter the room again.
* If you tick "Remember this decision" in the permission pop-up, you will not be asked every time.
Settings on your computer or smartphone itself
Even if you have allowed access in your browser, it will not work if the camera or microphone is blocked in the settings of your computer or smartphone itself. If the steps above do not help, please check these as well.
1. Open "Start" > "Settings" > "Privacy & security" > "App permissions" > "Microphone".
2. Check that "Microphone access" is on.
3. Check that "Let apps access your microphone" is on.
4. Check that "Let desktop apps access your microphone" is on.
5. Do the same for the camera: go to "Settings" > "Privacy & security" > "Camera" and turn on "Camera access" and "Let apps access your camera".
1. Open "Start" > "Settings" > "Privacy" > "Microphone".
2. Check that "Microphone access for this device" is on.
3. Check that "Allow apps to access your microphone" is on.
4. Check that "Allow desktop apps to access your microphone" is on.
5. Do the same for the camera: turn it on under "Settings" > "Privacy" > "Camera".
1. Choose "System Settings" from the Apple menu.
2. Select "Privacy & Security" in the sidebar.
3. Select "Microphone" and turn on the browser you are using (Chrome, Safari and so on).
4. Turn on "Camera" in the same way.
* If you use Safari on a Mac, you also need the Safari steps in "Allowing camera and microphone access in your browser" above. Please note that both settings are required.
1. Open "Settings" > "Privacy & Security".
2. Tap "Microphone" and turn on Safari (or Chrome).
3. Turn on "Camera" in the same way.
* A green dot appears at the top of the screen while the camera is in use, and an orange dot while only the microphone is in use. If neither appears during your lesson, your camera and microphone are not running.
1. Open Chrome and tap the "More" icon to the right of the address bar.
2. Tap "Settings" > "Site settings" > "Camera" or "Microphone".
3. If "netchai.online" appears under the blocked sites, select it and tap "Allow".
If you have not granted Chrome microphone permission on the phone itself, you also need to enable it under "App permissions" in your Android settings.
